

Definition of a slip knot
A knot that can easily be made tighter or looser by pulling one of its ends, as defined by Cambridge.org. To expand upon this and make it relevant to crochet, the slip knot is the first thing you will do when you start a project. This knot allows your to work your next stitch by using the slip knot loop. Let’s talk about the different parts or anatomy of the slip knot.
Anatomy of a slip knot
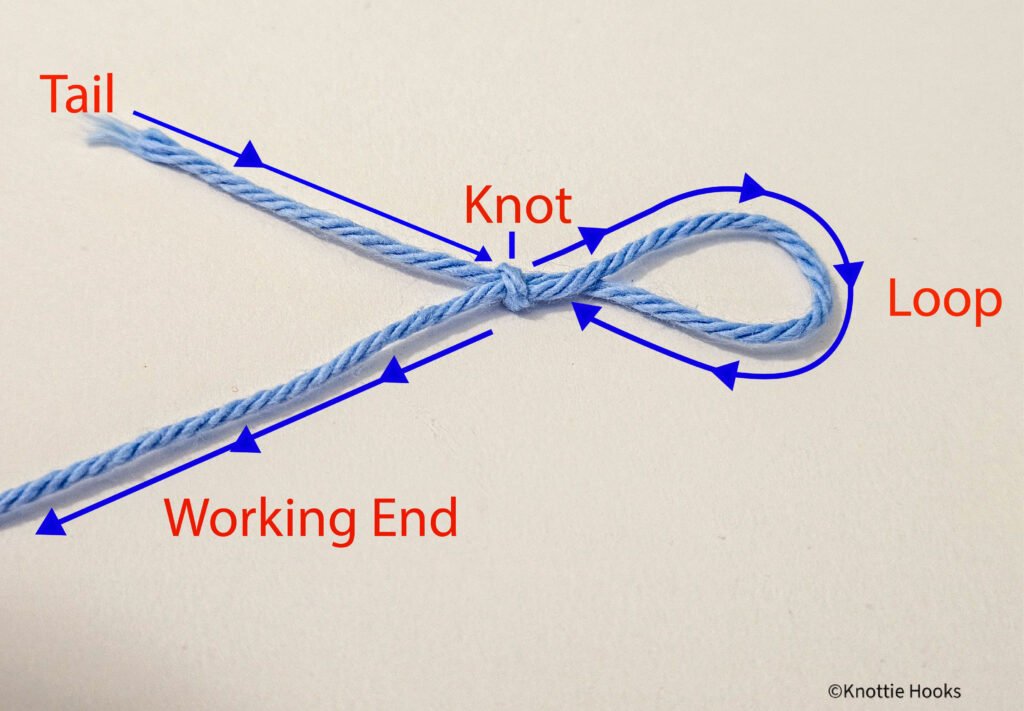
The slip knot has four parts.
- the tail
- working end
- loop
- and the actual knot.
The tail is the section of yarn that stretches from the knot to the beginning of the yarn strand. Follow the tail to the knot also known as the bight. The knot is what holds the yarn together. Step over the knot to the loop. The loop is what rests on the shaft of your hook, prepared to crochet the next stitch. If you follow the loop around you are back at the knot. Step over the knot again and here you have your working end. This portion of the yarn will stretch all the way back to the skein of yarn and will use to continue working stitches.

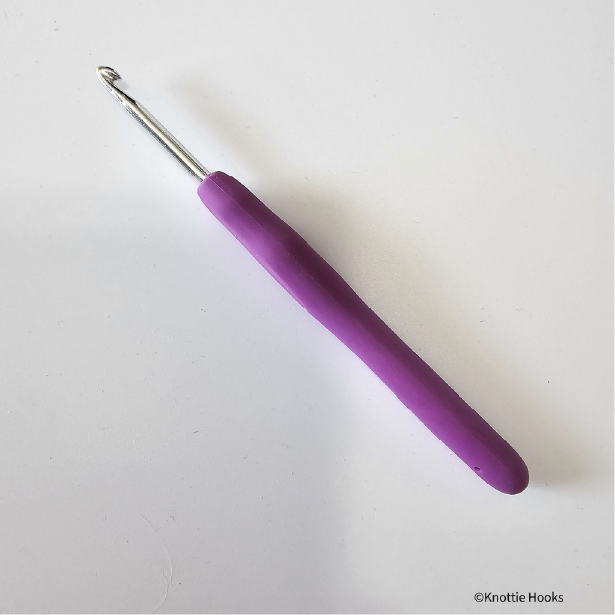
Check out my post “all about crochet hooks” where I break down the anatomy of crochet hooks!
Lets learn to make a slip knot
Ok, you have your hook, yarn, and hands now lets walk you through how to use them all together. First I am going to show you how this looks off the hook. This is to show you how the knot is constructed then we will get into how to do it on the hook.
How to make a slip knot without a hook
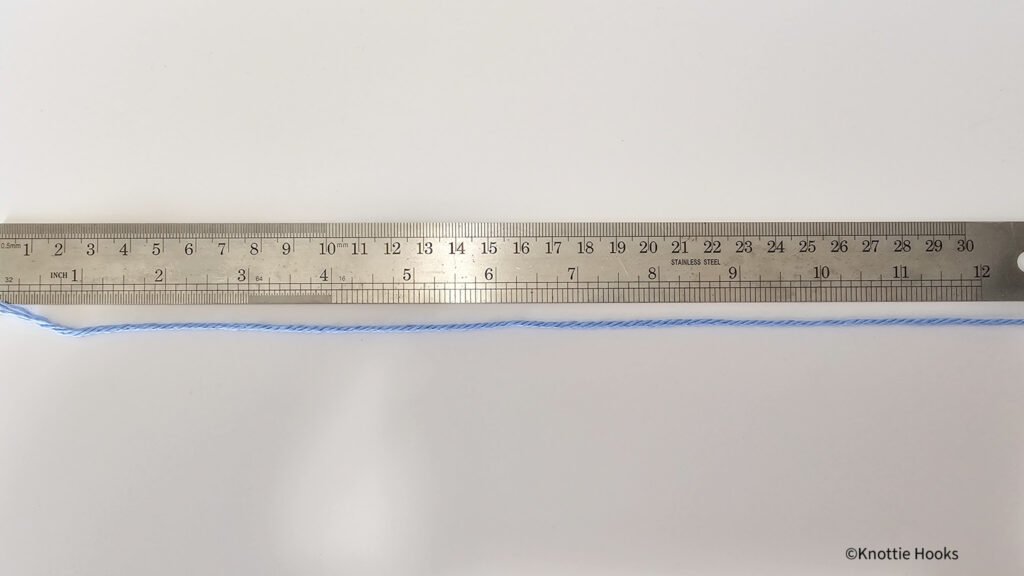
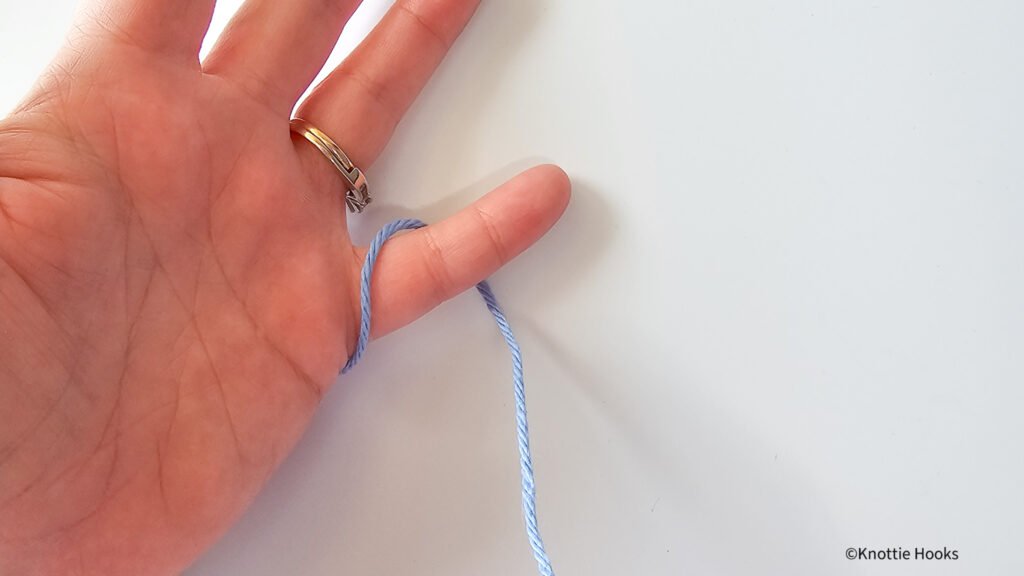
To begin pull about nine inches of yarn from your skein of yarn.
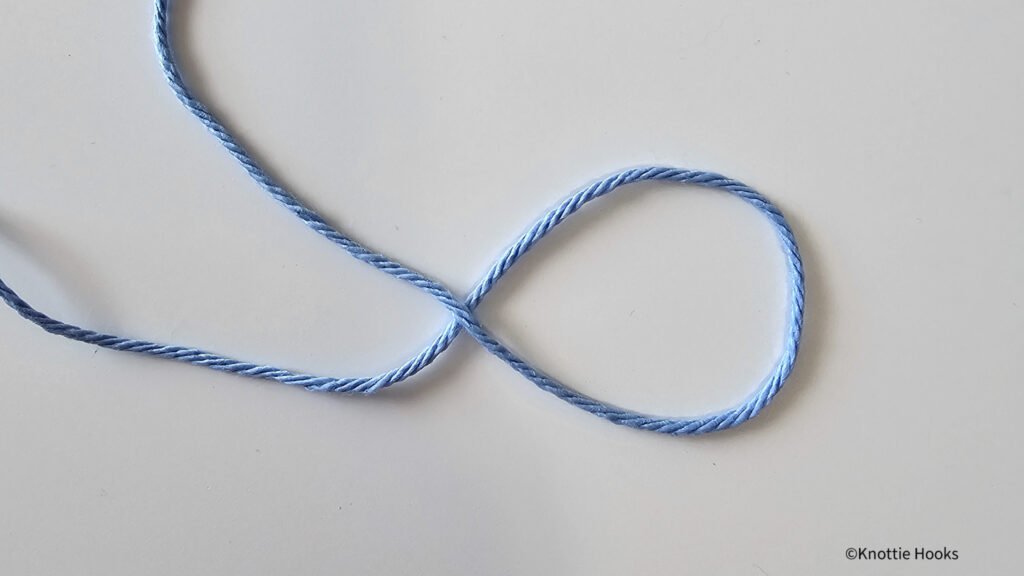
Next, remember that tail we talked about. Cross the tail over the yarn to make a loop.

After that, slip the tail under the working end of the yarn.
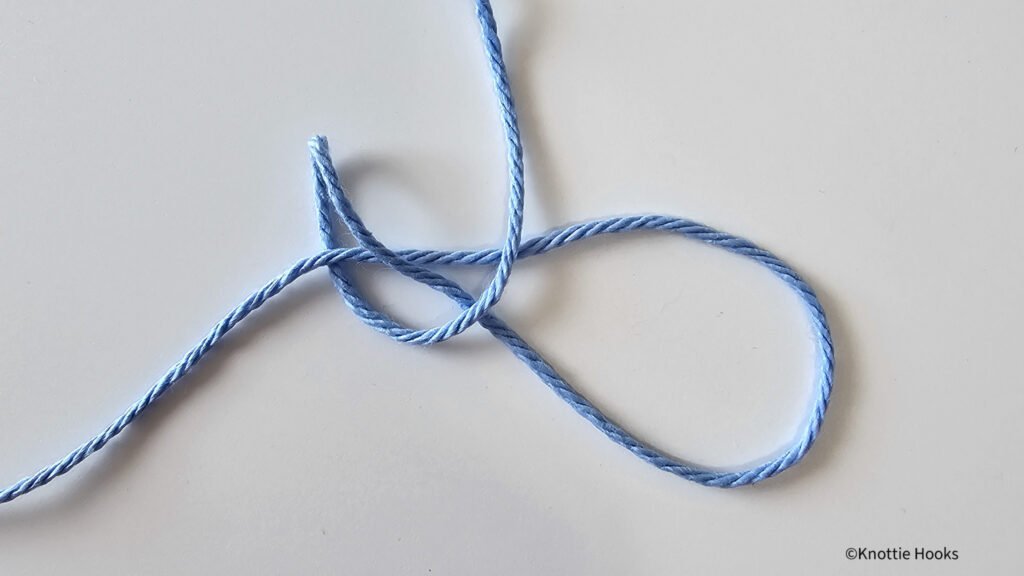
Then cross the tail over the loop close to the first cross of step one. See how you made another loop on the working end of the yarn?

Insert the tail through that second loop and pull it though opening. Your tail and working end should now be on the same side of where the knot will be.

Hold both strands of yarn that make up the loop in your right hand. Tug on the tail to tighten the slip knot.
Great Job You Did It!
You took your first step toward crocheting! You could just insert your hook into the loop here or you could take your skills one step further and do this on a hook. Are you ready to add a hook? Great let’s keep going…
This next tutorial might seem like a lot but that is because I broke this down to Every… Single… Little… step. When you work the slip knot for real, you will see what I mean. But I want help everyone learn crochet, so this is for the ultimate beginner, no matter what age or skill level.
What you will need to start practicing

You are ready to start practicing! Grab a hook and some yarn and lets get started. If you are feeling over whelmed, that’s ok, I’m going to help you through this. Below is a VERY detailed walk through of how to master the slip knot.
There is more than one way to do this. I will show you how I do it and I have added some links to YouTube so you can see me do it. I am also including links to other crochet YouTubers that do it a little different and have great videos!
How to make a slip knot with a crochet hook

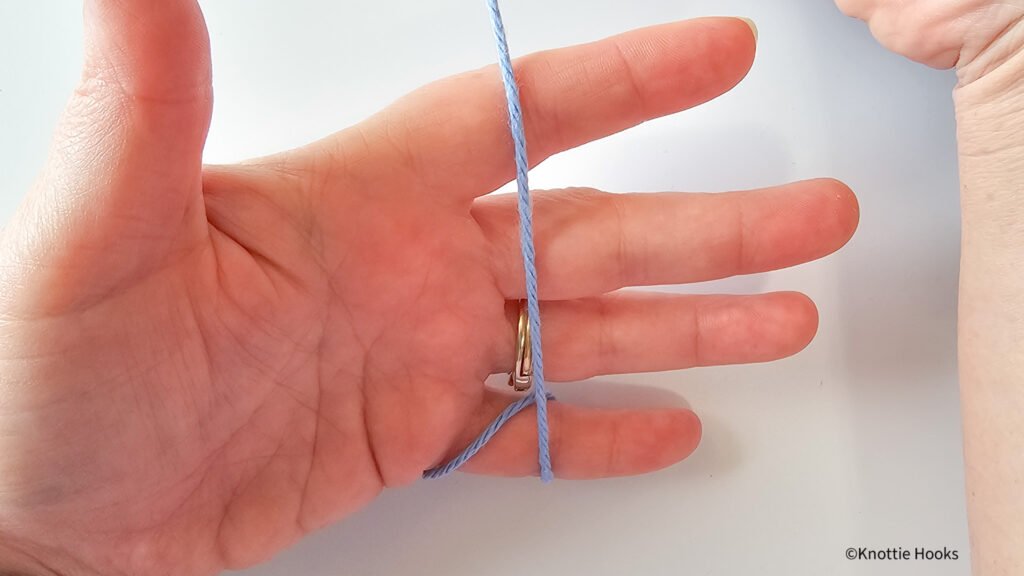
Start by placing the yarn across your left pinky with the tail facing away from your left hand. Be sure to leave enough yarn on the tail end to continue working the stitch, about four inches.
Then pull the tail of the yarn down, toward your body so that it drapes over the top of your pinky and around the outer side.
After that, pull the tail of the yarn up across the base of your fingers so that it extends beyond your index finger. If you need more yarn gently pull the tail to give yourself more slack.
Now that the tail is extended beyond your index finger, simply place your index finger in front of the yarn.
Then pull the tail down over your index finger toward your body.

Once you draped the tail over your index finger pinch the tail with your thumb and middle finger, keeping your index finger extended.
You are doing good. We’re getting to the good part now. Let’s recap real quick. At this point your yarn should be wrapped around your pinky, across the base of your fingers palm side, then around your extended index finger, and pinched with your thumb and middle finger. The tail of the yarn is between these two fingers and the working yarn is anything that is behind the pinch. Another way to look at it is that the working end is wrapped around your index and pinky fingers. Let’s keep going.

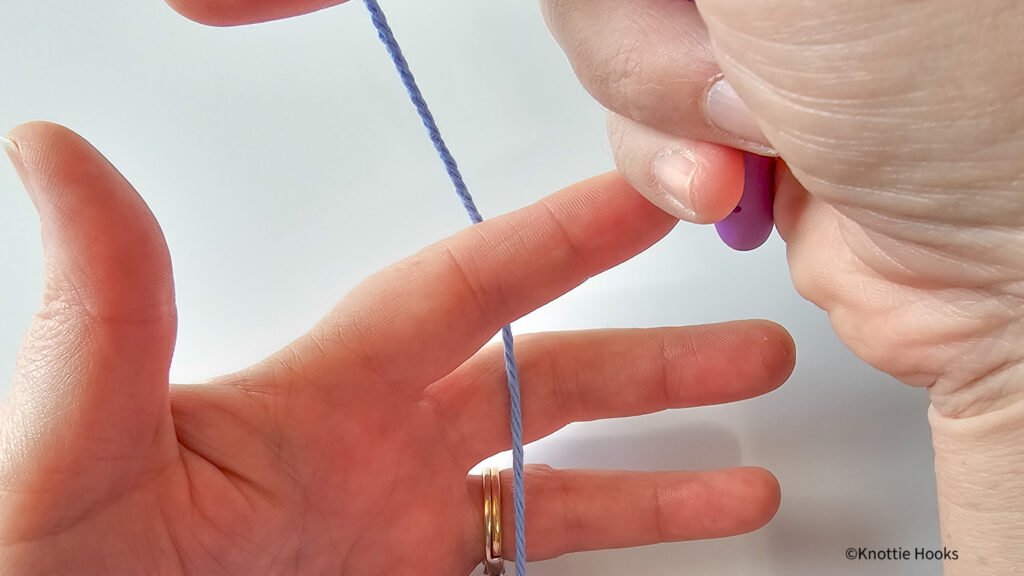
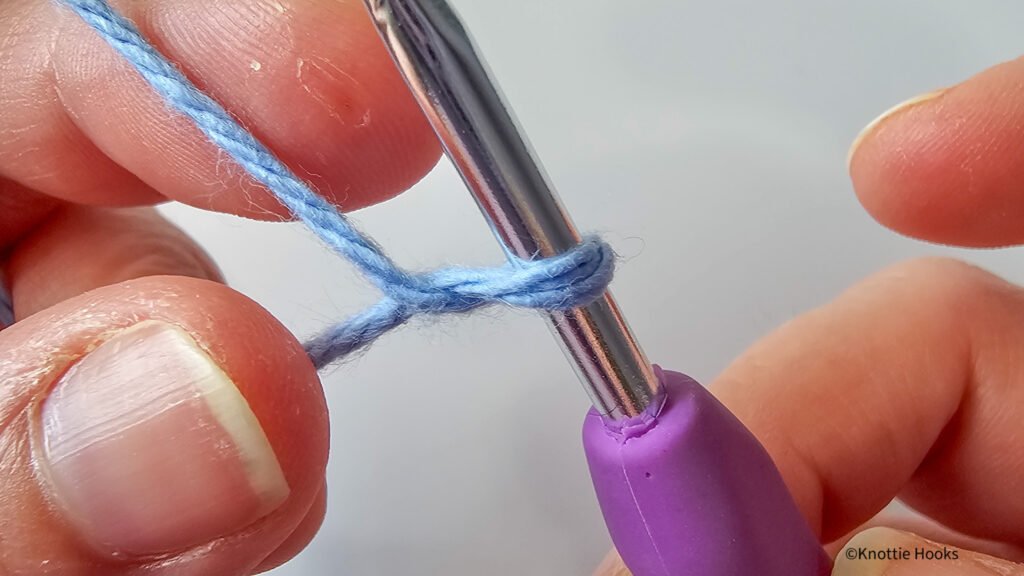
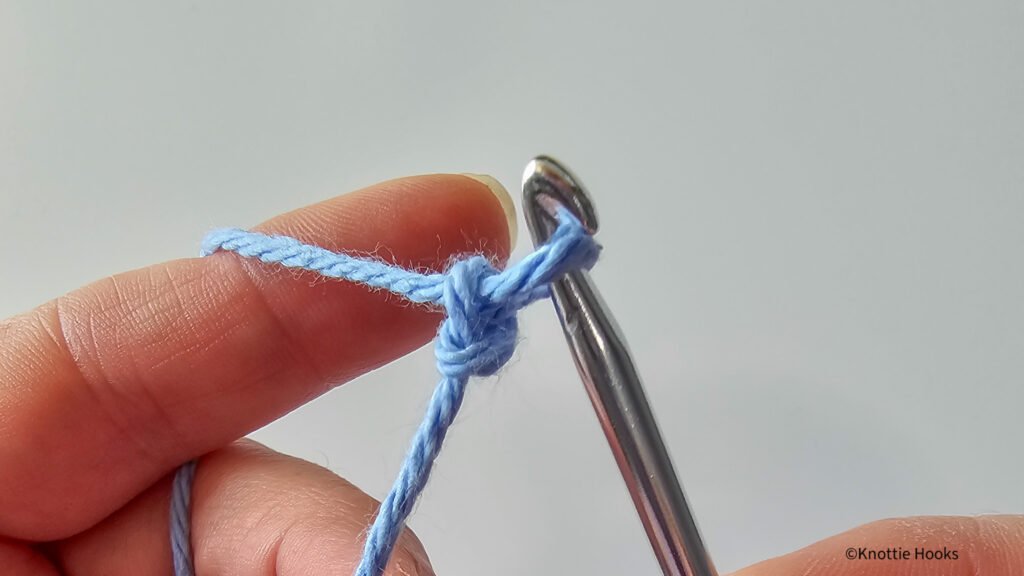
Use your pinky to put a little pressure on the working end of the yarn. Place your hook, with the lip facing up at you, under the working yarn, between the pinch and your index finger.

Pull the hook slightly up away from your left hand, allow the yarn to move along your pinky finger. You will control your tension with the pinky finger, this will take practice so it’s ok if its hard right now. The more you do it the easier it will get.
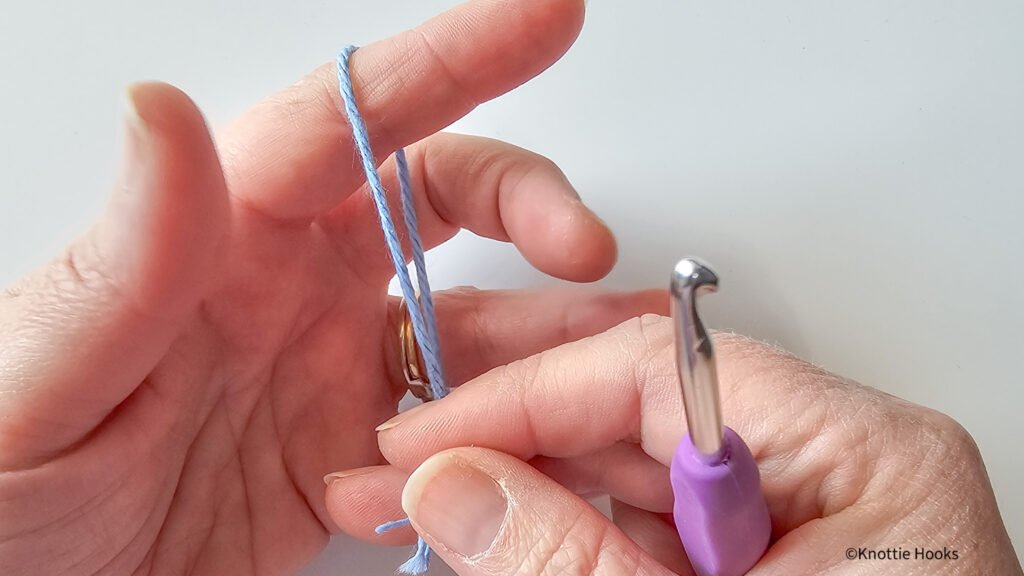
Rotate the hook toward your body 180 degrees. The head should now be pointing down. (I changed the way I’m holding my hook here. It was just easier while taking pictures. There’s no need to change your grip.)
Continue rotating the hook in the same direction another 180 degrees. You can see the twist you made.
You have now rotated the hook toward your body and continues rotating away from your body to complete a 360 degree turn. Your yarn now has a twist.

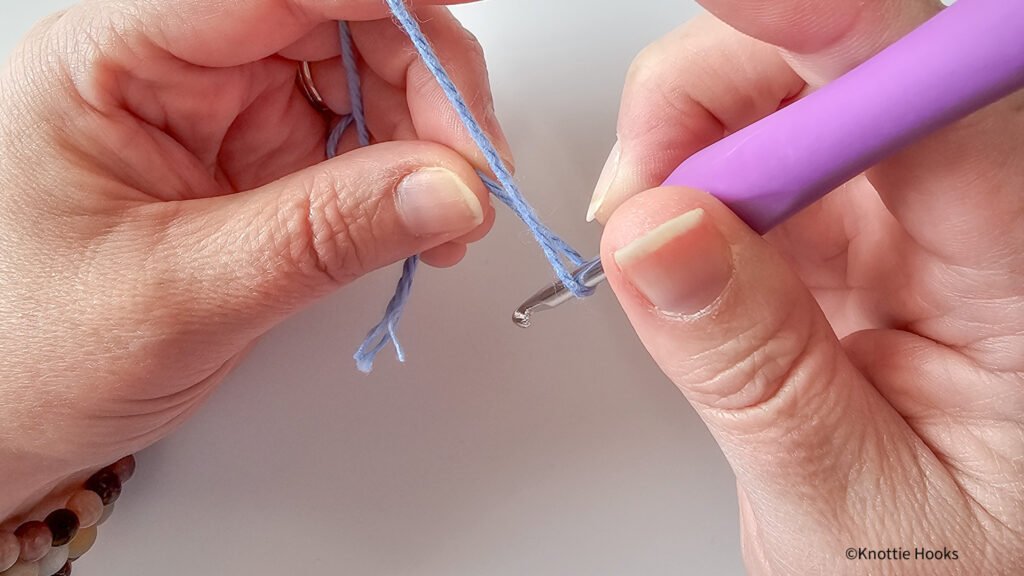
Use your thumb and middle finger to pinch the twist you just made. To make it easier so you do not drop your work, gently pull the hook with your right hand and the yarn on your left hand slightly taught as you move your fingers.

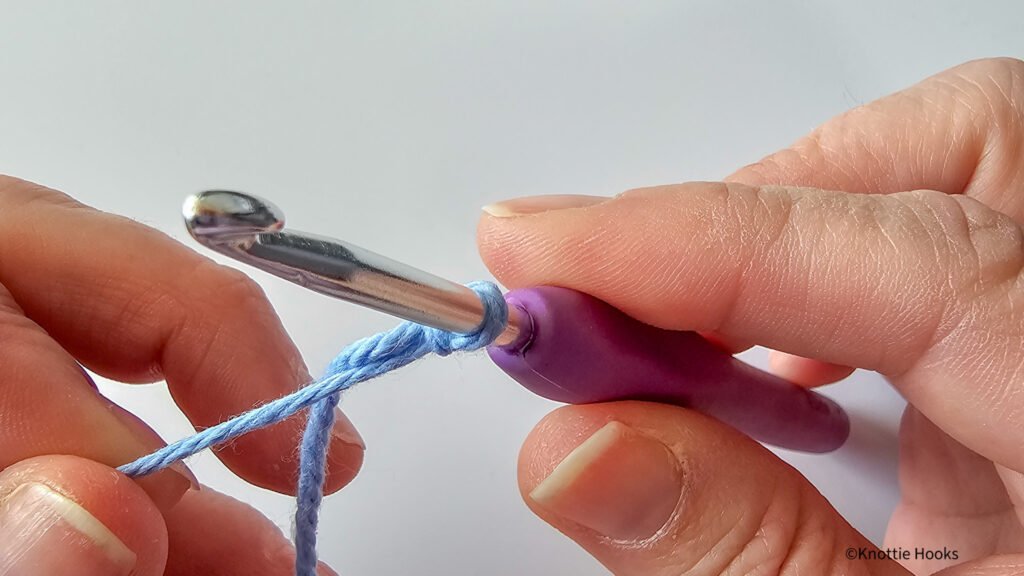
Now the fun part. In a downward motion rotate your hook away from your body so that it is now under the working end of the yarn. Then continue rotating the hook allowing the yarn to wrap around the shaft of the hook.
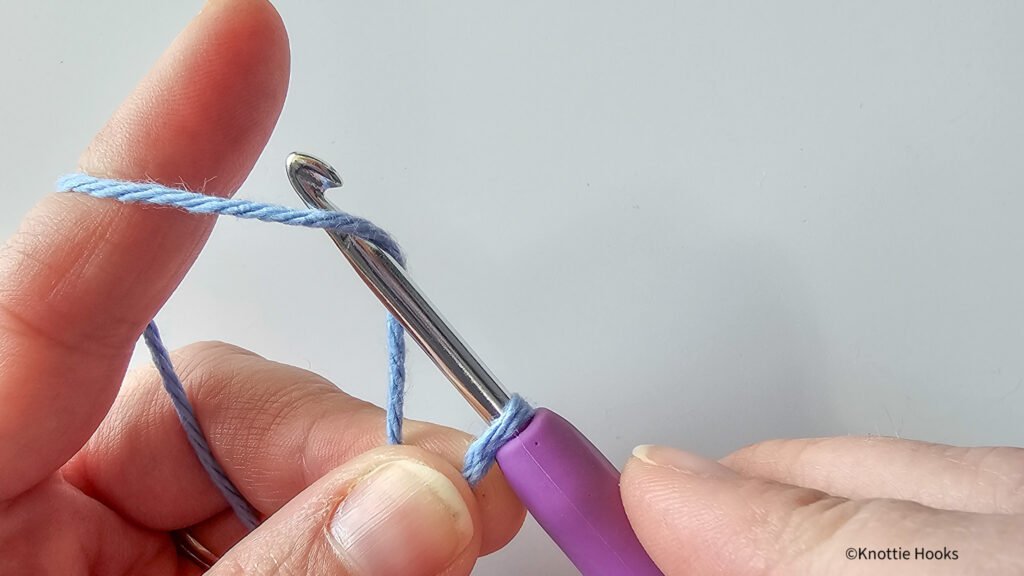
Then continue rotating the hook allowing the yarn to wrap around the shaft of the hook
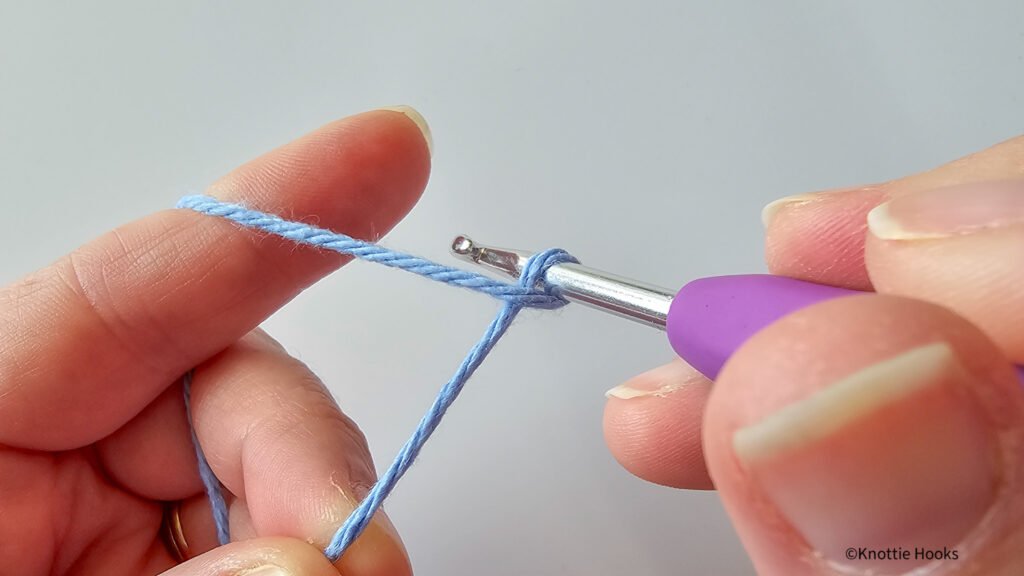
Turn the hook so that the bowl and lip face down

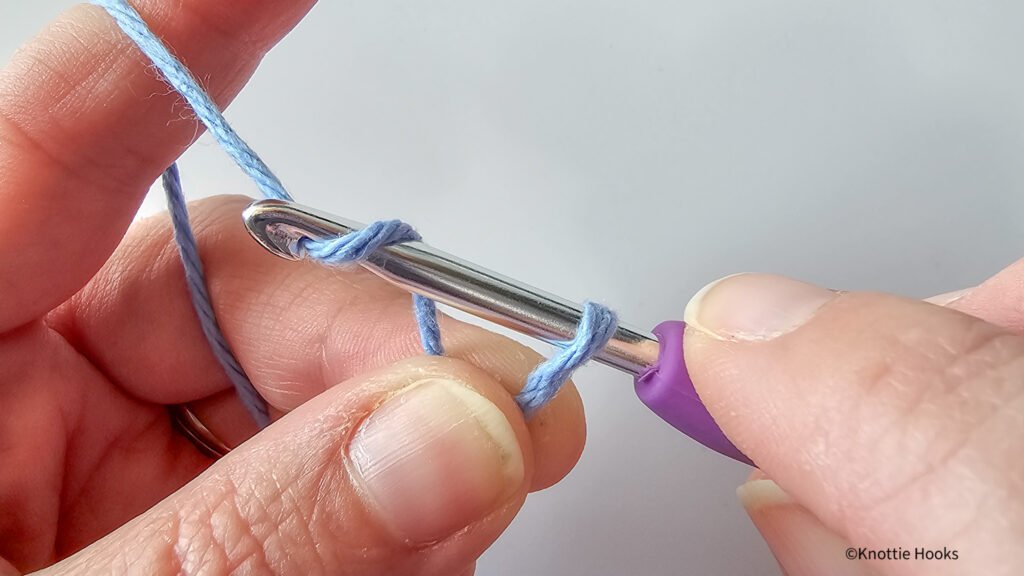
Begin to pull the hook to the right allowing the loop on the shaft to slide along the hook. The yarn you just wrapped around your hook should be comfy cozy in the bowl of the hook.

Use the hook to pull the yarn through the loop.
It should look like this.
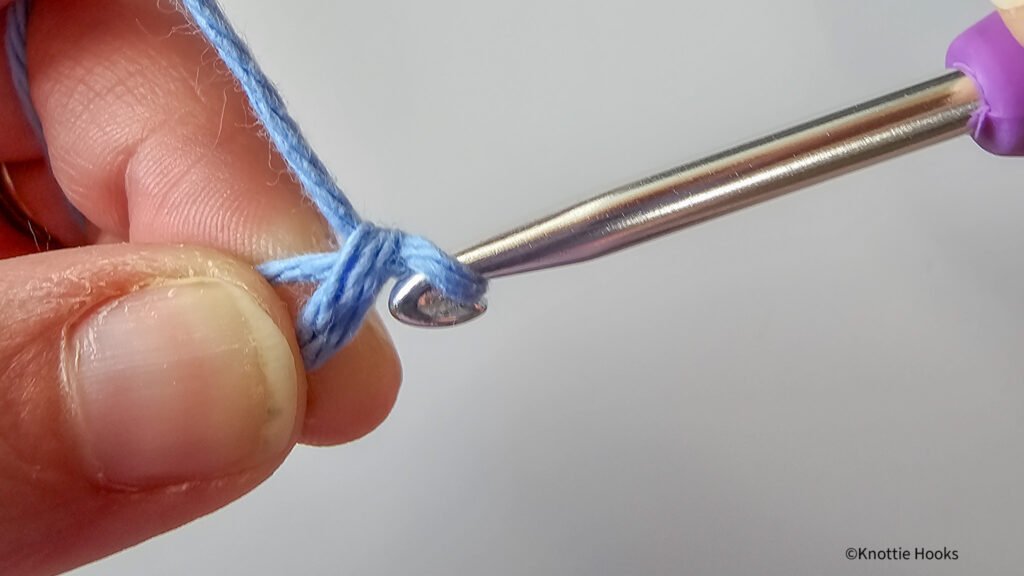
Once the head of the hook and the yarn are through the loop, rotate your hook toward your body and up toward the sky.

Let go of the tail end of the yarn, and grab the working end of the yarn with your thumb and middle finger.
To tighten the slip knot, simply pull on the working end of the yarn. Do not over tighten, or you will not be able to work your next stitch. You just made a slip knot! Way to go!!!
Wow how does that feel? If you need to see how this is done in motion here are the helpful links I promised you. Defiantly check them out. I watched each one to be sure they were all to the point, clear, and different from one another.
See it in action

- Frotties Crochet Lab- https://youtu.be/hNCYT6QLUjU?si=ZWt6bCy1S7fniid6
- Holly Auna- https://www.youtube.com/watch?v=THBKnrzyjhU
- Happy Berry Crochet- https://www.youtube.com/watch?v=lSNC5tDW6rI
- Marly Bird- https://youtu.be/saYect2dfWk
Outro
You made it through your first stitch tutorial. How does it feel? Exciting? Confused? Proud? Over whelmed? Please let me know if this helped you at all. Remember to take your time. Crochet is learned one stitch at a time and please reach out if you have any questions. When you’re ready for the next step, head over to Knottie Notes and get started on “all about the single crochet”!